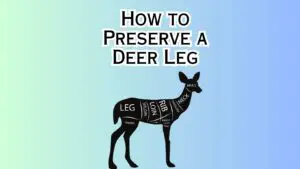
Deer legs can be preserved through a process of curing and smoking. The first step is to cure the deer leg by covering it in a salt-based cure. This will help to draw out moisture and preserve the meat.
The leg should then be smoked for several hours, which will further preserve the meat and give it flavor.
Deer feet taxidermy! Very unusual whitetail feet!
- Cut the deer leg at the knee joint and remove the foot
- Skin the deer leg, being careful not to cut through the meat
- Rub the flesh of the deer leg with a salt mixture
- Hang the deer leg in a cool, dry place for 3-4 weeks
- Wrap the deer leg in cheesecloth or muslin and store it in a cool, dark place
How to Make Deer Leg Nunchucks
Assuming you want a step-by-step guide on how to make nunchucks out of deer legs: Supplies needed: -2 medium to large sized deer legs
-leather lacing or rope -scissors -knife (optional)
Instructions: 1. Start by thoroughly cleaning the deer legs. This can be done by soaking them in warm water and soap for a few hours, then scrubbing them with a brush.
You may also need to use a knife to remove any excess hair or tissue. 2. Once the legs are clean, allow them to dry completely. 3. Cut the leather lacing or rope into two equal lengths.
Each length should be long enough to wrap around one of the deer legs, plus an additional foot or so. 4. Take one of the lengths of lacing and begin wrapping it tightly around one of the deer legs, just below the knee joint. Continue wrapping until you reach the top of the leg, then tie off the end securely.
Repeat this process with the other length of lacing and remaining deer leg. 5. At this point, you should have two nunchucks made from Deer Legs! To use them, simply hold one in each hand and swing away!
What to Do With a Deer Leg
Deer hunting season is in full swing and if you’re lucky enough to bag a deer, you might be wondering what to do with the meat. One of the most popular cuts of deer meat is the leg, which can be roasted, grilled, or even made into jerky. If you’re not sure how to prepare a deer leg, don’t worry – we’ve got you covered.
Read on for everything you need to know about cooking a deer leg. The first step is to remove the skin from the leg. This can be done by carefully slicing it off with a sharp knife.
Once the skin is removed, trim any excess fat from the meat. Next, it’s time to marinate the deer leg. This will help tenderize the meat and give it flavor.
There are many different marinades that can be used, but we like this simple recipe: Combine 1 cup of red wine vinegar, 1/2 cup of olive oil, 1 tablespoon of salt, and 1 teaspoon of black pepper in a large resealable bag. Add the deer leg to the bag and refrigerate for at least 4 hours (overnight is best).
How to Dry Deer Hooves
Deer hooves can be dried for a variety of purposes, including crafts, taxidermy, and even as dog chews. The process is simple and only requires a few supplies. Here’s how to dry deer hooves:
What You’ll Need: – Deer hooves (1 per person) – Bleach
– Large bucket or container – Gloves – Wire hangers
– Newspaper Instructions: 1. Soak the deer hooves in a bleach solution overnight.
This will help to clean and disinfect them. 2. The next day, rinse the hooves off with water and then pat them dry with a towel. 3. Using gloves, twist each wire hanger into the shape of an S. Then thread the hanger through the center of each hoof so that it can suspend the hoof in midair.
4. Place your prepared hooves on top of some newspaper in a well-ventilated area (outside is best). Allow them to air dry for several days until they are completely hard and brittle. 5. Once dry, you can remove the wire hangers and use your deer hooves as desired!
How to Dry Deer Legs for Dogs
Dry deer legs are a great treat for dogs and can be easily made at home. All you need is a dehydrator and some fresh deer legs. Start by trimming the meat from the bones and cutting it into small pieces.
Then, spread the pieces out on the dehydrator racks and set the temperature to low. Dry for 8-12 hours or until completely dry. Store in an airtight container in the fridge for up to 6 months.
What to Do With Deer Hooves
If you find yourself with a deer hoof and are wondering what to do with it, here are some ideas. Deer hooves can be used for a variety of things, from making crafts to creating garden décor. One popular way to use deer hooves is to create rustic wall hooks.
To do this, simply clean the hooves and then screw them into the wall. You can then hang coats, hats, or other items from the hooks. This is a great way to add a bit of country charm to your home.
Another idea is to create a wind chime out of deer hooves. Simply drill holes into the center of each hoof and thread string or wire through them. Attach bells or other trinkets to the bottom of the string and enjoy your homemade wind chime!
If you’re crafty, you could also try making a pair of deer hoof bookends. Glue two hooves together at the base and then prop up your favorite books on top. These make for unique conversation starters and look great on any bookshelf.
Finally, deer hooves can also be used as part of a garden décor project. For example, glue several small Hooves together in a cluster and place them in your flower bed as an eye-catching accent piece. Or, suspend a few Hooves from tree branches using fishing line for an interesting take on traditional wind chimes.
Can You Preserve a Deer Foot?
Deer feet can be preserved in a number of ways. The most popular method is to simply salt them and hang them up to dry. This will kill any bacteria and prevent the foot from rot-ting.
You can also preserve deer feet by tanning them. This process will make the feet more flexible and durable, preventing them from cracking or breaking. Tanning deer feet is a bit more time consuming than simply salting them, but it will result in a higher quality product that will last longer.
How Do You Clean Deer Legs?
When it comes to cleaning deer legs, the process is actually quite simple. First, you will need to remove any hair that may be present on the legs. This can be done by using a sharp knife or a pair of pliers.
Next, you will need to remove the skin from the legs. To do this, you will need to make a cut along the back of each leg, being careful not to cut into the meat. Once the skin has been removed, you can then begin to clean the legs with warm water and soap.
Be sure to rinse them thoroughly afterwards. Finally, you will need to dry off the legs before storing them in a cool, dry place.
How Do You Skin Deer Legs?
The first step is to remove the hide from the legs. To do this, make a cut around the back of each leg at the top of the hindquarters. Then, starting at the bottom of each leg, make a shallow cut along the inside of each leg and work your way up.
Be careful not to cut too deeply or you will puncture the muscle tissue beneath the hide. Once you have made these cuts, you can begin to peel back the hide. Start at the top of each leg and work your way down, using your knife to loosen any areas that are stuck.
As you peel back the hide, be sure to remove any bits of hair or flesh that are still attached. Once you have removed all of the hide, you can discard it or save it for another use. Now that you have exposed the muscle tissue beneath, it’s time to start skinning.
Starting at one end of each leg, make a shallow cut along the length of each muscle group. Work your way down each leg, making sure not to cut too deeply into the meat. You should be able to peel back strips of muscle tissue with ease – if they are resistance, use your knife to loosen them up a bit.
Continue until all of the muscle tissue has been removed from both legs. You should now be left with two bare bones covered in a thin layer of fat and connective tissue. If desired, this can be trimmed away before cooking or consuming – but it is not necessary as it will render down during cooking anyways.
And there you have it – two perfectly skinned deer legs ready for whatever dish you have in mind!
How Do You Prepare Deer Hooves?
If you’re looking to add a unique and rustic touch to your home, one way to do it is by incorporating deer hooves into your decor. But before you can start using them as part of your interior design, you need to know how to prepare deer hooves. Here’s a step-by-step guide on how to do just that:
The first thing you’ll need to do is remove the hair from the hooves. You can do this by soaking them in hot water for a few minutes, which will loosen the hair so that you can easily scrape it off with a blunt knife or putty knife. Once the hair is removed, give the hooves a good cleaning with soap and water.
You may also want to disinfect them with bleach or rubbing alcohol. Next, you’ll need to dry the hooves thoroughly. You can let them air dry or use a blow dryer on low heat.
If they’re not completely dry, they could develop mold or mildew. Once they’re dried, apply some sort of sealant to the hooves. This will help protect them from dirt and dust and keep them looking their best.
You can use polyurethane, lacquer or even clear nail polish for this step. Let the sealant dry completely before moving on to the next step. Now it’s time to prep the hooves for hanging!
Drill small holes into each end of the hoof – these will be used for attaching hooks or nails so that you can hang them up later on. Alternatively, you could also glue felt pads onto the bottom of each hoof if you don’t want to make any holes in them. Hang your newly prepared deer hooves and enjoy your unique home decor!
Conclusion
In order to preserve a deer leg, the first thing you need to do is skin it. Next, you need to remove all of the meat from the bone. Once the bone is removed, you need to cut the leg into manageable pieces.
Next, you need to salt each piece of the leg. Once the leg is salted, you need to put it in a container and cover it with water. Finally, you need to put the container in a cool place and allow it to sit for at least 24 hours.

Welcome to Zeke’s Blogging Adventures! Dive into expert insights on travel, camping, hunting, and fishing. Our team boasts expertise and experience. We hope you enjoy reading our blog Thanks for stopping by!